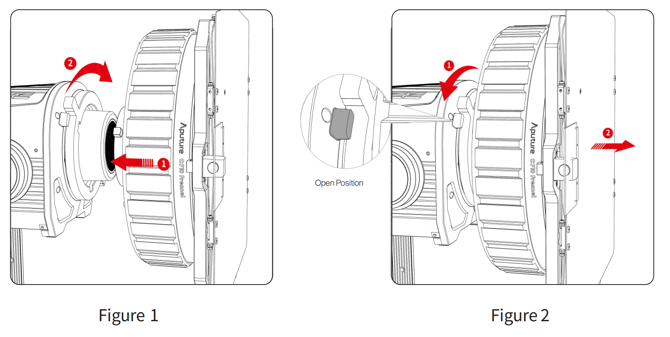
1. Attaching/Detaching the Fresnel Attachment
To attach the CF10 Fresnel, insert it into the ProLock Mount and rotate the Pro-Lock Handle clockwise until it locks (as shown in Figure 1). To detach the CF10 Fresnel, rotate the Pro-Lock Handle counterclockwise to the open position and remove the Fresnel (as shown in Figure 2).
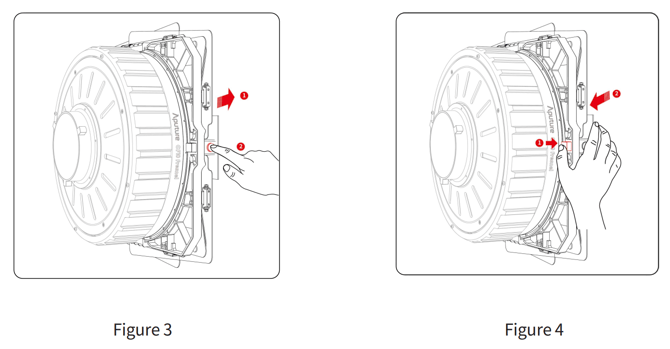
2. Attaching/Detaching the Barn Doors
To attach the Barn Doors, slide them onto the front lip of the CF10 Fresnel (as shown in Figure 3, Step 1). Then, press the quick-release locking latch to secure them in place (as shown in Figure 3, Step 2). To detach the Barn Doors, release the latch (as shown in Figure 4, Step 1) and slide them off the lip of the Fresnel (as shown in Figure 4, Step 2).
3. Installing the Safety Chain
Secure the safety chain to the designated mounting hole on the CF10 Barn Doors (as shown in Figure 5).

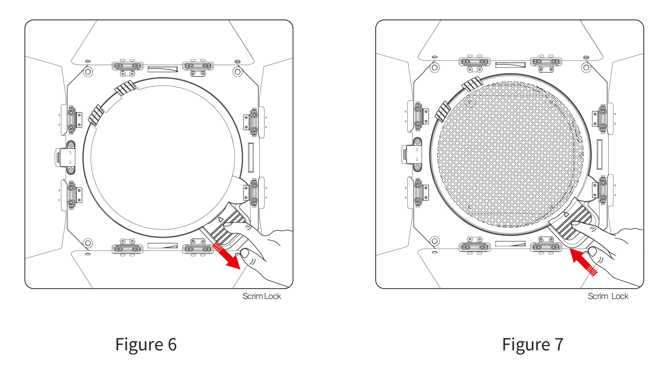
4. Installing Scrims
To install scrims into the CF10 Barn Doors, open the scrim lock and place the 10-inch scrim into the circular holder as shown in Figure 6. Then, slide the scrim lock to secure it in place, as shown in Figure 7. Ensure the scrim is fully seated and locked before use.