1. Attaching/Detaching the NOVA 2x1 Removable Yoke with Junior Pin
Attaching the Yoke
Insert the lamp yoke Junior Pin into a 1.125 inch/28mm Junior Pin receiver. Lift the Lamp Head, align it with the quick-release mechanism and lower the Lamp Head vertically to complete the installation.
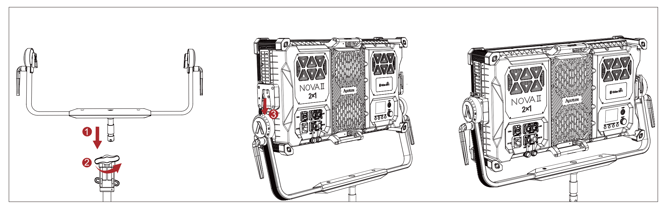
Detaching the Yoke
While holding the Carrying Handle of the lamp, turn the Yoke Release Lever on both sides of the yoke until they unlock. Lift the Lamp Head upwards to remove it from the yoke.
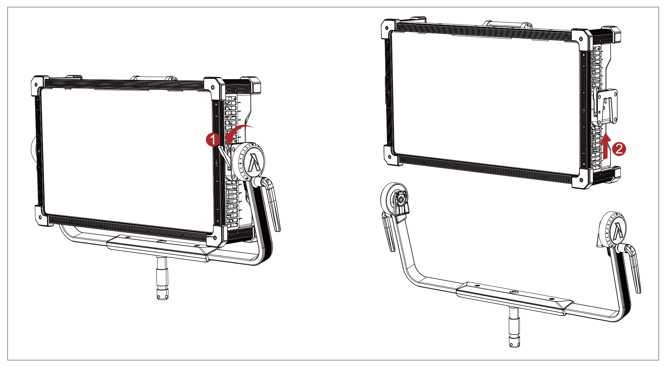
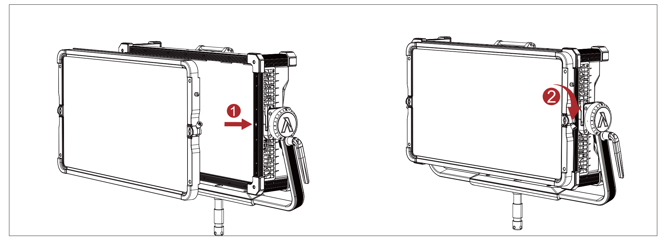
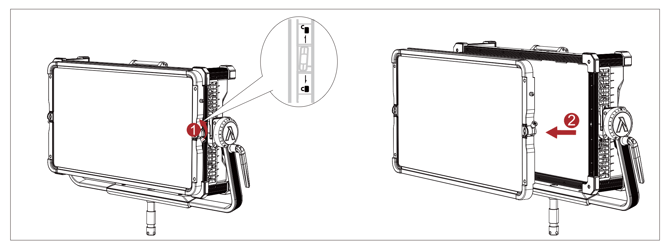
2. Attaching / Detaching the Flat Diffuser
Attaching the Flat Diffuser
Ensure the Quick Clip Lever is in the "Open" position indicated on the frame of the Flat Diffuser. Align the left/right side Quick Clip keys with the matching openings on the Lamp Head, insert the Flat Diffuser, and push the Quick Clip Levers on both sides into the "Locked" position.
Detaching the Flat Diffuser
Pull the Quick Clip Levers and push them into the "Open" position indicated on the frame of the Flat Diffuser. Pull the Flat Diffuser away from the Lamp Head.
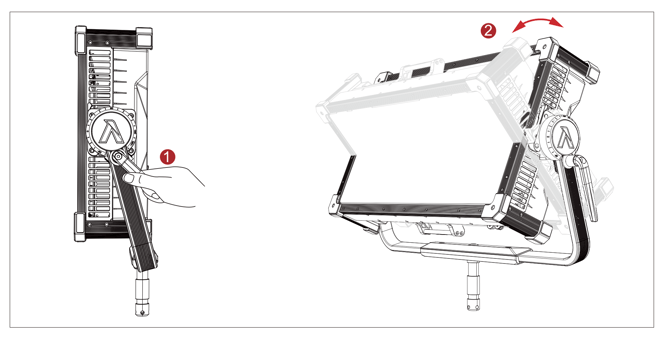
3. Setting Up the Lamp Head
Loosen or tighten the disc brake handle on the yoke to adjust the fixture's angle of tilt.
4. Powering Up the Lamp Head
NOVA II 2x1 supports a full voltage range operation from 100V to 240V.
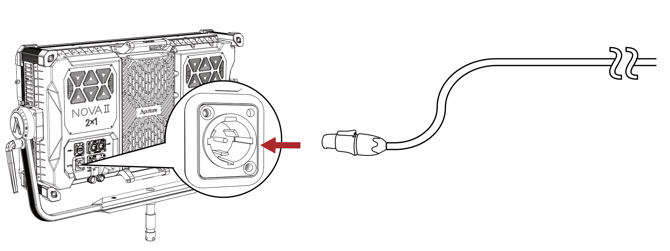
Before use, please ensure that the power supply system can support the maximum power consumption of the NOVA II 2x1 (max 1250W). If the actual maximum output of the power system is insufficient or if the AC output is not up to specifications, the NOVA II 2x1's power system protection mechanism will be triggered, resulting in malfunction or inability to operate properly.