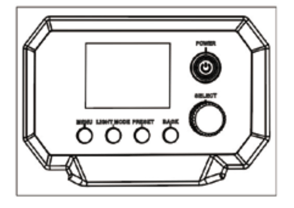
Press the button on the Control Panel to enter the corresponding modes: MENU, LIGHT MODE and PRESET.
Menu
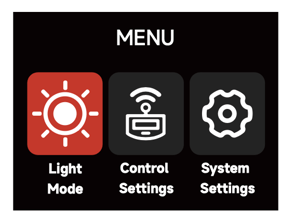
Press the MENU button to enter the System Menu interface. Choose between Light Mode, Control Settings or System Settings.
Accessing Lighting Modes
Press the Light Mode Button on the Control Box to enter the Light Mode interface. Choose between CCT, HSIC+, RGB, GEL, Source, xy, FX, and Sidus FX Modes.
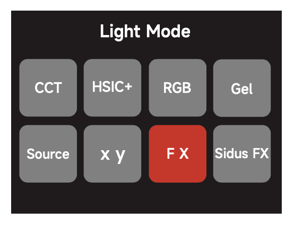
Light Modes can only be accessed when no DMX data is present. Please ensure that DMX data is not being listened to by the Control Box in order to use Light Modes.
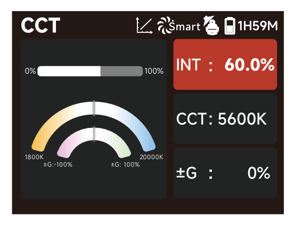
CCT Mode
Adjust the Color Temperature (1800K-20000K) and the ± Green level (-100% - +100%).
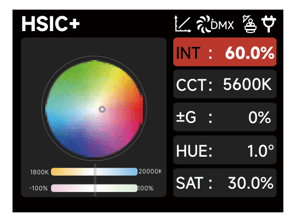
HSIC+ Mode
Adjust the Intensity (0-100%), Color Temperature (1800K-20000K), ± Green level (-100% - +100%) and Hue/Saturation.
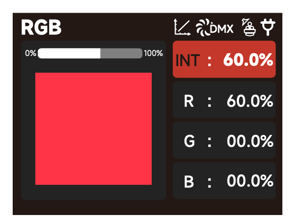
RGB Mode
Set the values of Red, Green and Blue (0-100%) to achieve the desired color; then use the Master Intensity to raise and lower the overall brightness of the light without changing the colors individually.
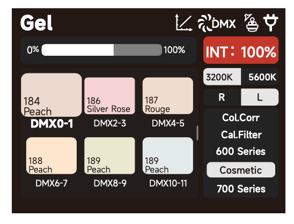
GEL Mode
Choose a base Color Temperature of 3200K or 5600K and the corresponding Rosco or LEE gel to output the desired light.
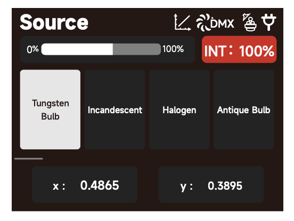
Source Mode
Select the light source to mimic and fine tune the xy coordinates.
xy Mode
Set the x coordinate value (0.1550-0.6815), y coordinate value (0.0300-0.5500) and the Intensity.
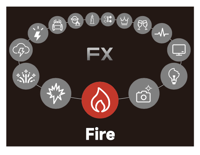
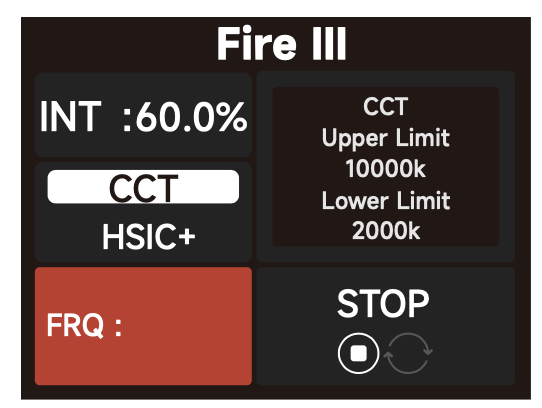
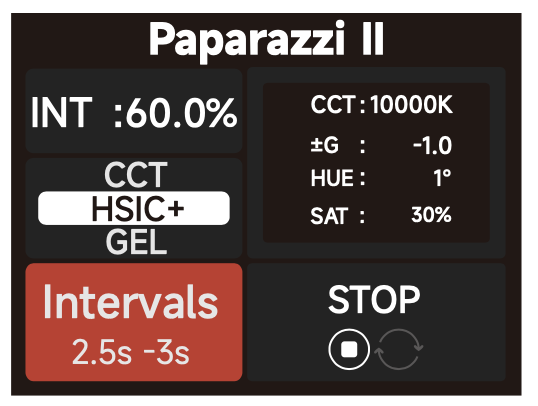
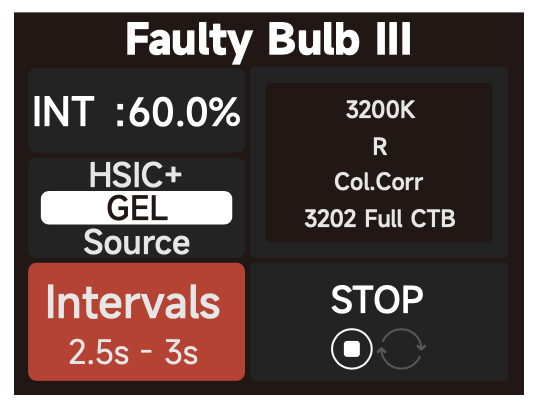
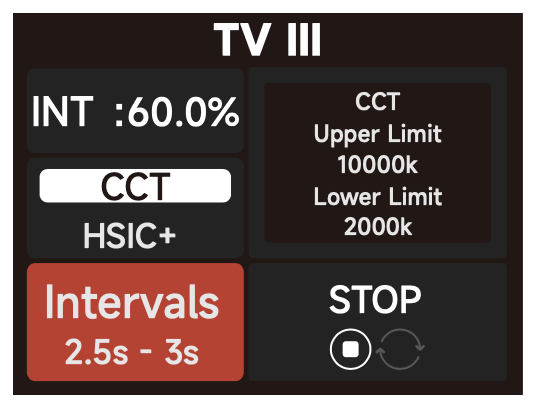
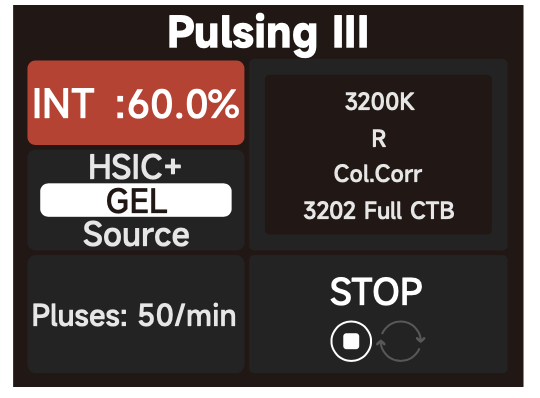
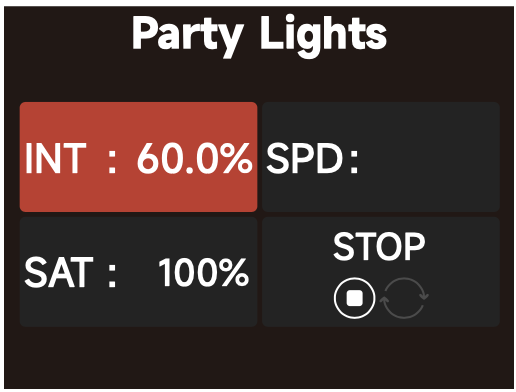
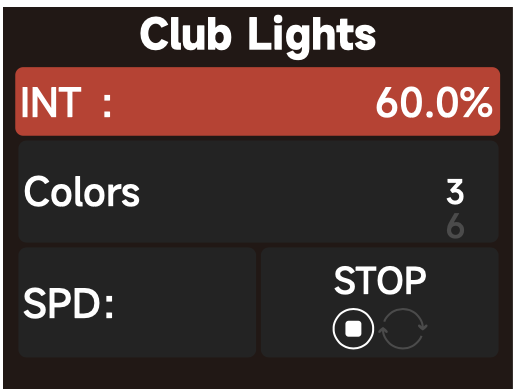
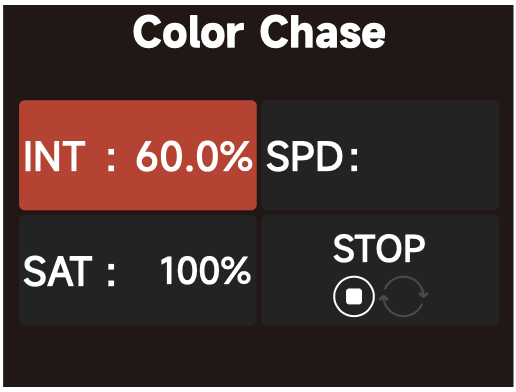
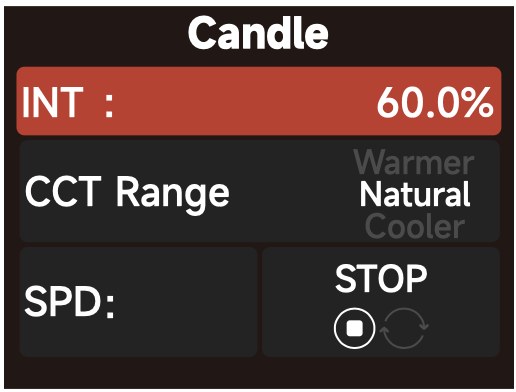
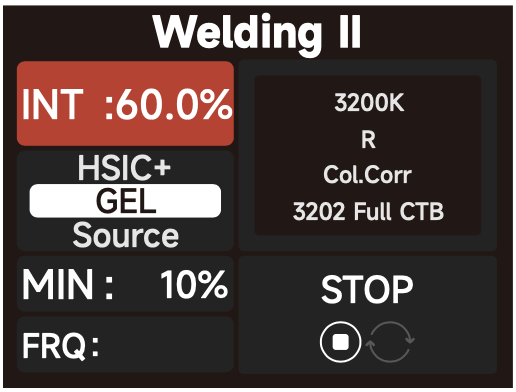
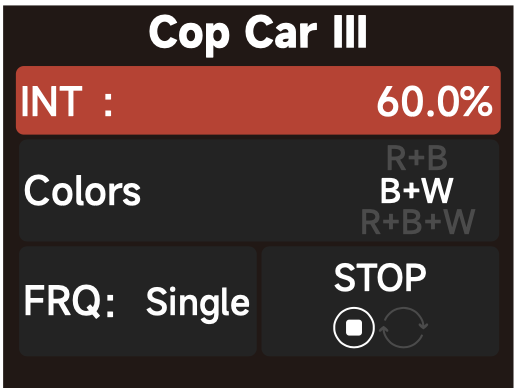
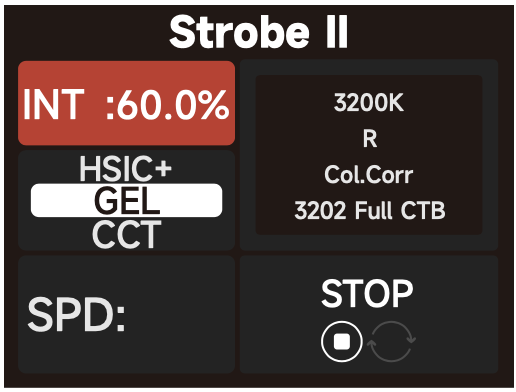
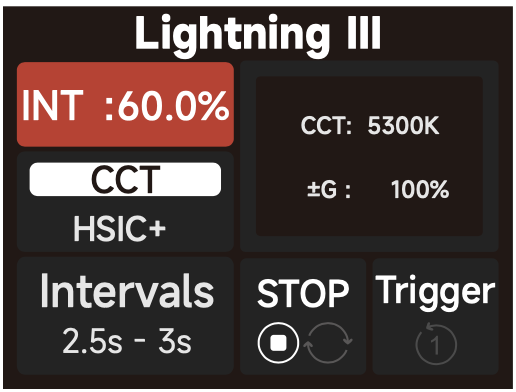
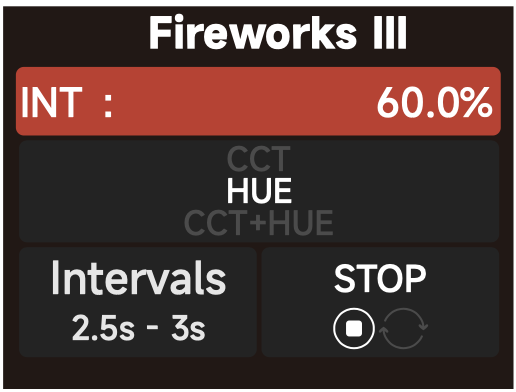
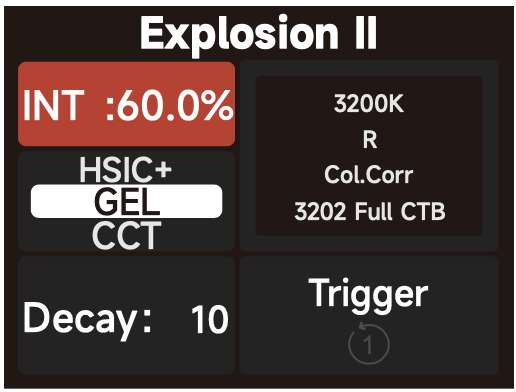
 FX Mode
Select between FX modes: Fire / Paparazzi / Faulty Bulb / TV / Pulsing / Party Lights / Club Lights / Color Chase / Candle / Welding / Cop Car / Strobe / Lightning / Fireworks / Explosion.
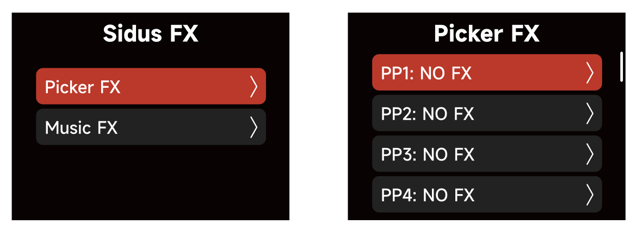
Sidus FX Mode
Select either Picker FX or Music FX. Both custom FX choices can save up to 10 FX. "NO FX" indicates that nothing has been saved to this slot. Untitled indicates that an effect has been saved to the slot. The two types of light effects can save 10 custom light effects each. The suffix "NO FX" indicates that no light effect has been saved.
Control Settings
Choose between: DMX Settings, CRMX Settings, Sidus BT Settings and Ethernet Settings.
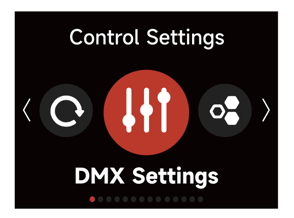
DMX Settings
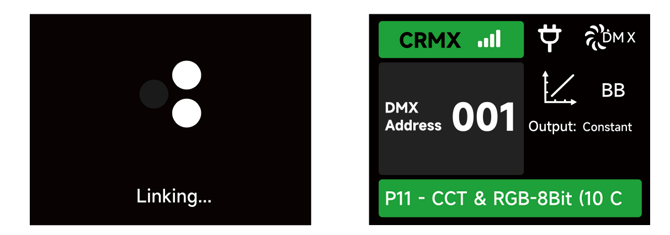
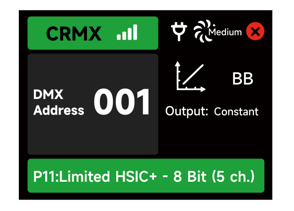
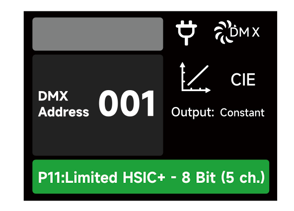
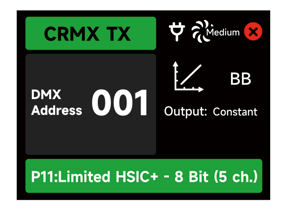
1) DMX Status Screen: Displays DMX data status, the DMX address , the DMX Profile being used, the CRMX Signal Strength, Fan Mode, Dimming Curve, Studio Mode in use, Output Mode and Power Status.

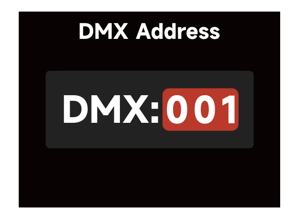
2) DMX Address: Set the DMX address of this fixture.
3) DMX Profile: Choose which DMX Profile to use. Refer to the DMX Chart for the specifics of each profile.

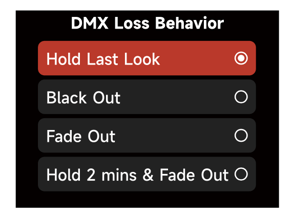
4) DMX Loss Behavior - Choose from the following options:
I. Hold Last Look: When DMX signal is lost, DMX values will be retained until signal is regained.
II. Black Out: When DMX signal is lost, the light will black out.
III. Fade to Black: When DMX signal is lost, the light will wait for 60 seconds before fading to black.
IV. Hold 2 min. & Fade Out: When DMX signal is lost, the DMX values are retained for two minutes before fading out over a duration of 60 seconds.
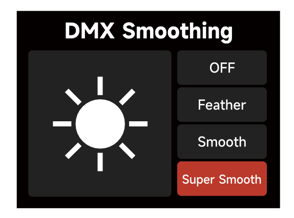
5) DMX Smoothing: Set the smoothness of DMX dimming.
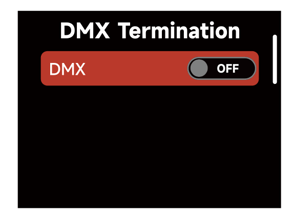
6) DMX Termination: Turn ON (to help with DMX signal reflection) of OFF.
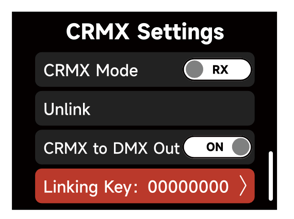
CRMX Setting
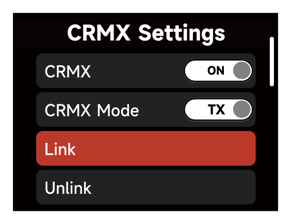
Turn CRMX ON or OFF.
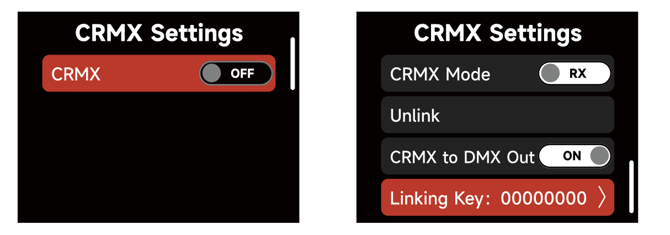
1) When CRMX is ON, the fixture will listen for its previously linked Transmitter. If the fixture is currently unliked, it will listen for a Transmitter link signal and link to any new CRMS link signal. Users can Unlink from previously linked Transmitters by selecting Unlink. Once a CRMX Link is established a DMX data is present, the display will change to the DMX Status Screen.
2) When in CRMX PX Mode, if CRMX to DMX Out is "ON", DMX data is pushed out of the DMX Out Port. If CRMX to DMX Out is "OFF", no data is pushed out of the DMX Out Port.
3) When utilizing CRMX TX Mode, the Control Box can transmit DMX data to CRMX receivers.
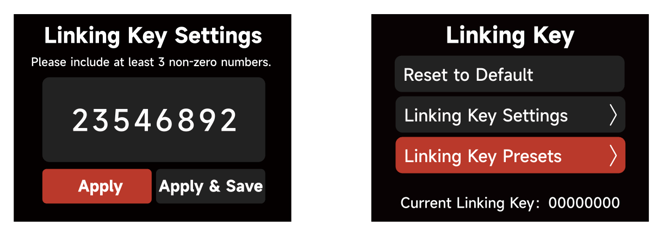
4) While acting as a CRMX TX, the Control Box can have a Linking Key for RX's to link to.
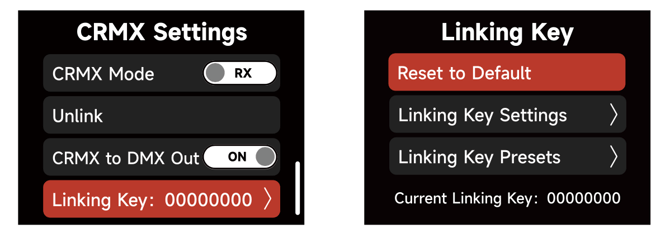
I. In the Linking Key interface, choose an 8 digit number to be the Linking Key. Three digits cannot be "0".
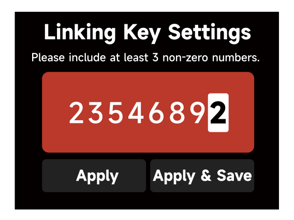
II. Choose "Apply" to set the Linking Key. Presets can be saved for future use by selecting "Apply & Save".
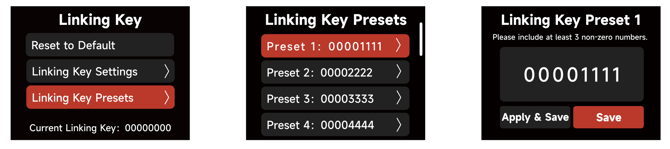
III. Save 10 Presets in total.
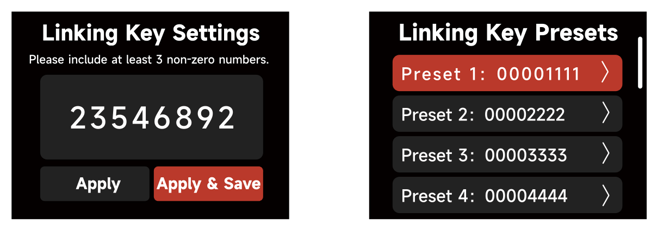
IV. In the Linking Key Preset interface, save up to 10 Presets by choosing "Save" or set the Control Box's Linking Key and save it as the selected Preset by choosing "Apply and Save".
5) CRMX RX (Receiving) Status
I. Signal Strenght: When DMX data is provided to the Control Box acting as an RX, the DMX Status Screen will indicate the CRMX signal strength the Control Box is receiving.
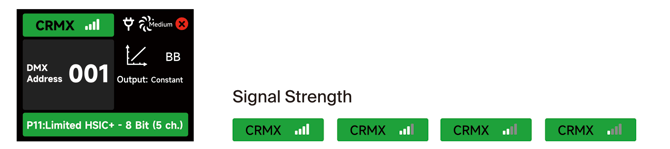
II. CRMX Signal is good and DMX data is present
III. No DMX data present
IV. The Control Box CRMX RX is out of range of its TX. Check that the TX is powered On and within range.
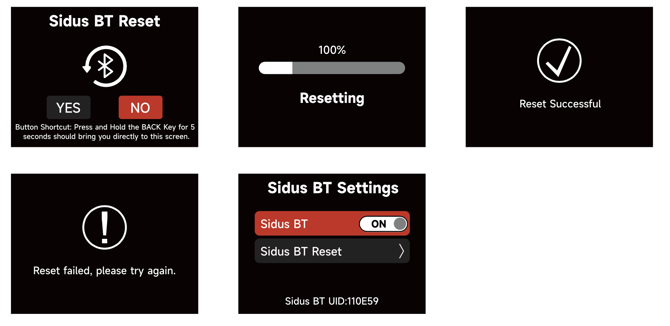
Sidus BT Settings
1) Turn Sidus BT ON of OFF in the Sidus BT settings.
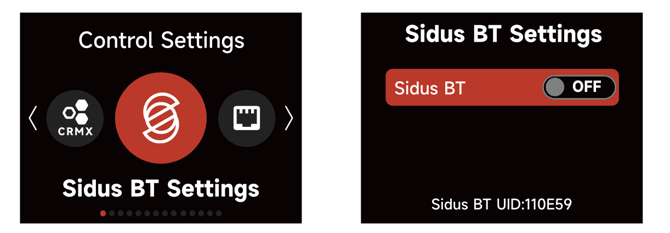
2) When Sidus BT is ON: The Sidus BT UID is displayed here to facilitate connecting with the Sidus Link Pro and Sidus Link Apps. Use Sidus BT Reset to allow your Sidus Link device to connect with a new controller. If Sidus BT fails to reset, a "Reset Failed" warning will pop up before returning to the Sidus BT Reset display.
Ethernet Settings
View and edit Ethernet Settings.
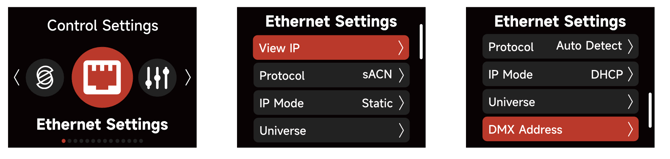
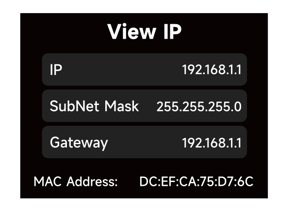
View IP
View the IP Address, Subnet Mask, Gateway IP and the MAC Address of the Control Box.
Protocol
Select the Control Protocol for this Control Box to listen to. Choose between Auto, Art-Net or sACN.
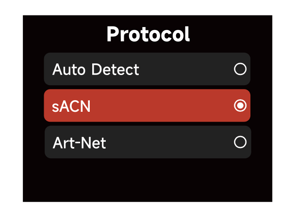
I. Automatic: Identifies the Control Protocol automatically.
II. Art-Net: Recognizes the Art-Net Protocol only and ignores sACN.
III. sACN: Recognizes the sACN Protocol only and ignores Art-Net.
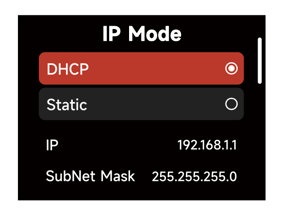
IP Mode
1) IP Mode DHCP:
The fixture will automatically receive an IP address the DHCP server. When in DHCP IP Mode, the IP Address, Subnet Mask and Gateway IP Address cannot be edited.
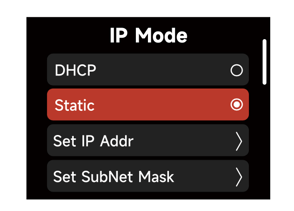
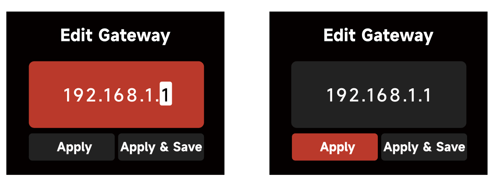
2) IP Mode Static:
Manually set the IP address, Subnet Mask and the Gateway IP address.
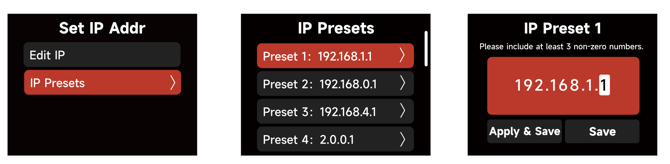
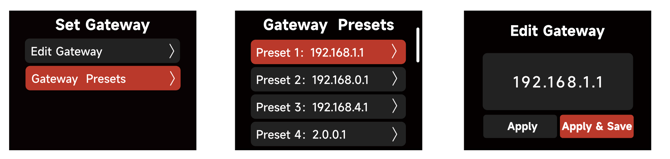
I. In the Presets interface, Select a Preset to edit or apply.
Presets can be edited and saved without applying them to the Control Box's current IP settings. (save 10 IP Presets in total)
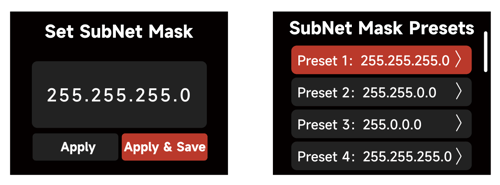
II. Set SubNet Mask
Using the Select Wheel, edit the Subnet Mask information for the Control Box. Use the "BACK Button" to Exit the interface.
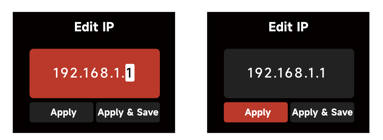
 Presets can be saved for future use by selecting "Apply & Save".
 Presets can be edited and saved without applying them to the Control Box's current IP settings (save 10 SubNet Mask Presets in total)
In the Presets interface, Select a Preset to edit or apply.

III. In the Presets interface, Select a Preset to edit or apply.
Presets can be edited and saved without applying them to the Control Box's current IP settings.
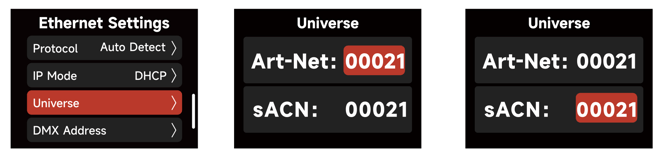
Universe
Set the Universe of Art-Net and sACN: Art-Net (00000-32767), sACN (00001-63999).
DMX Address:
Set the DMX Address
Lead/Follow Mode
In this interface, set the fixtures as either the Leader or the Follower (Leader/"OFF"). The Leader automatically sends its settings to the Follower fixtures for synchronization. Batch upgrades of the firmware from a USB drive on the Leader's port is also possible.
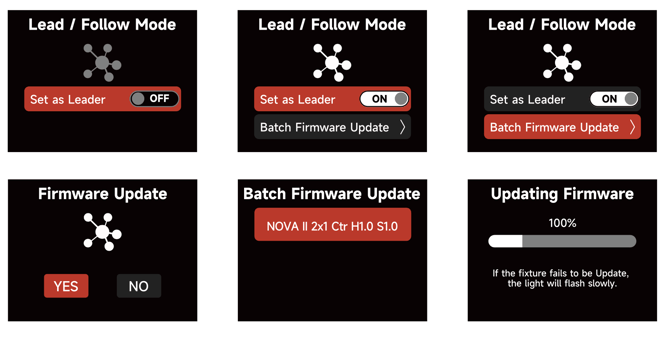
The leader fixture should be connected with the followers via DMX to enable this function.