![Aputure_amaran_KnowledgeBase_Logo.png]](https://help.aputure.com/hs-fs/hubfs/Knowledge%20Base/company%20files/Aputure_amaran_KnowledgeBase_Logo.png?height=40&name=Aputure_amaran_KnowledgeBase_Logo.png)
Follow these steps to assemble and power up your STORM CS32 before first use.
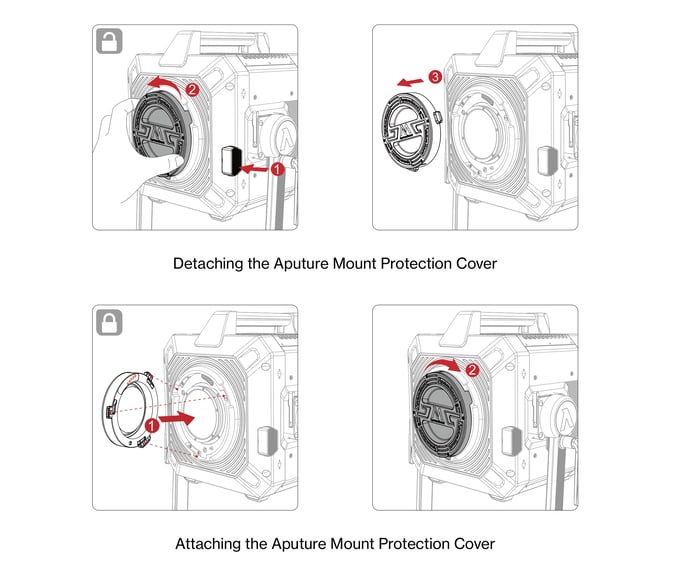
1. Attaching/Detaching the Aputure Mount Protection Cover
Press the release button while simultaneously rotating and pulling out the protective cover to detach it. To attach the cover, align it with the mount and rotate in the opposite direction until it locks.
Remove the protective cover before use. Reattach it during transportation and storage.
2. Attaching/Detaching the Reflector
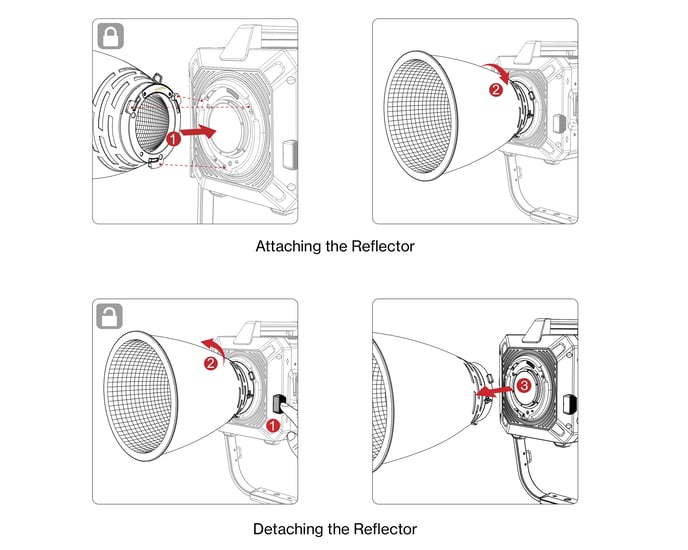
Align the reflector with the Aputure Mount, insert it, and rotate to lock it in place. To detach, press the release button and rotate the reflector in the opposite direction before pulling it free.
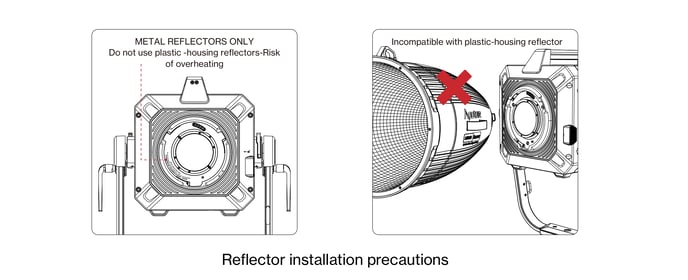
Use metal-housing reflectors only. Plastic-housing reflectors are not compatible with the CS32 and risk overheating.
3. Attaching/Detaching the Yoke
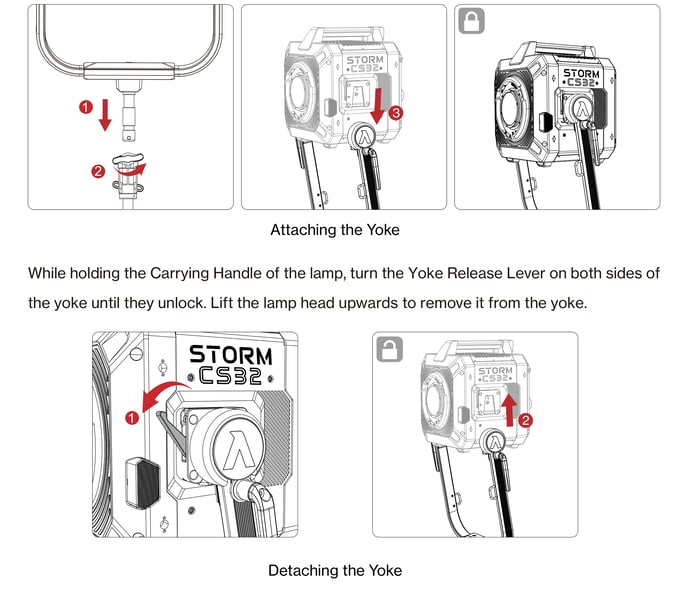
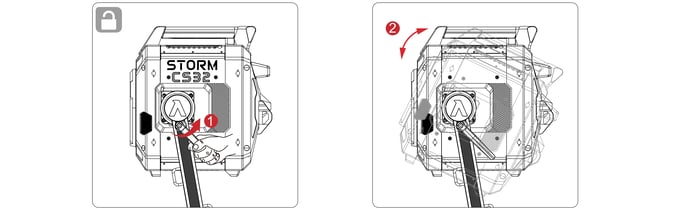
Insert the yoke's Junior Pin into a 1.125 in / 28 mm Junior Pin receiver. Lift the Lamp Head, align it with the quick-release mechanism, and lower it vertically to complete installation.
To detach, hold the Lamp Head's Carrying Handle, turn the Yoke Release Lever on both sides of the yoke until they unlock, then lift the Lamp Head up and away from the yoke.
After installation, verify that the quick-release handle is fully locked. If the red warning indicator on the handle remains visible after assembly, the fixture is not fully locked; reinstall it. If the handle unlocks accidentally during operation, re-seat the fixture by lifting it up, or rotate it to align the Lamp Head's LED panel with the base of the yoke until you hear a click. For easier installation and removal, keep the Lamp Head perpendicular to the yoke.
4. Setting Up the Lamp Head
Loosen or tighten the disc brake handle on the yoke to adjust the fixture's tilt angle.
5. Using the Aputure Ultra Clamp
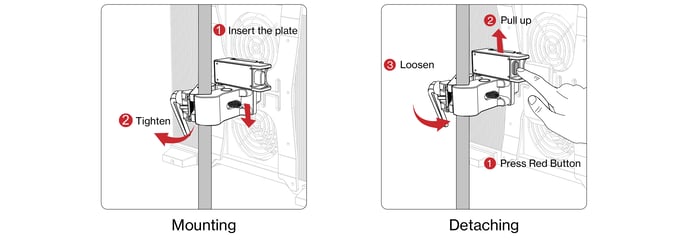
Turn the clamp's L-shaped handle clockwise to secure it to the center column of a light stand or another stable structural component. Align the Control Box's mounting plate with the clamp's V-shaped slot and insert it vertically; the clamp's red side button springs back into place to confirm a successful installation.
To remove the Control Box, press the clamp's red button all the way down and slide the Control Box vertically upward. Turn the L-shaped handle counterclockwise to remove the clamp itself.
| Clamp Specification | |
|---|---|
| Weight | 920 g |
| Dimensions | 183 × 110 × 83 mm |
| Square Tube Range | 20×20 mm to 40×40 mm |
| Round Tube Range | Dia. 3/8" (9.53 mm) to Dia. 2.25" (57.15 mm) |
6. Connecting the Lamp Head to the Control Box
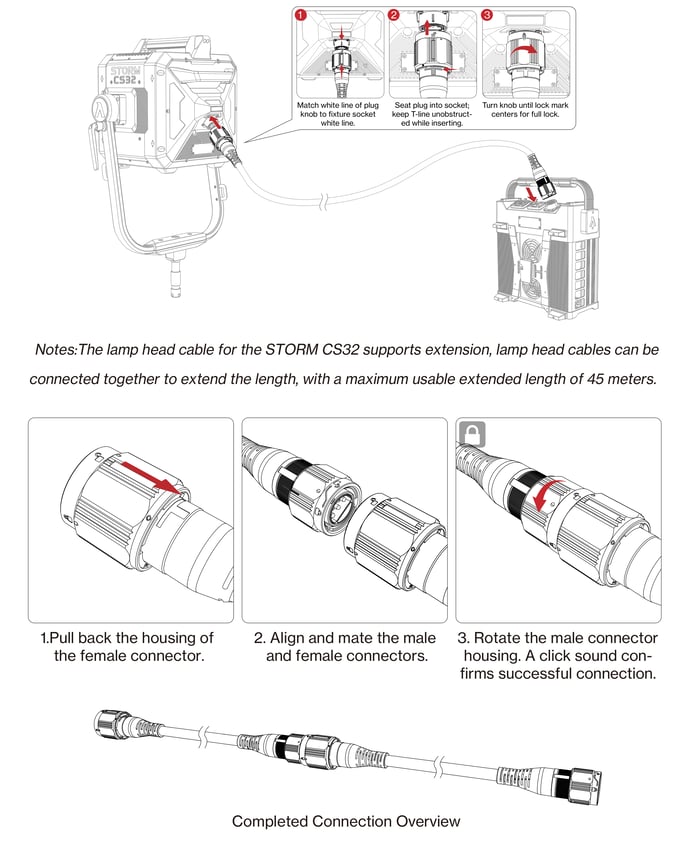
Connect the Lamp Head to the Control Box using the 7.5 m Lamp Head Cable. Match the white line on the plug knob to the white line on the fixture socket, seat the plug into the socket while keeping the T-line unobstructed, then turn the knob until the lock mark centers for a full lock.
The STORM CS32's Lamp Head Cable supports extension. Cables can be daisy-chained together for a maximum usable length of 45 meters.
7. Powering Up the Control Box
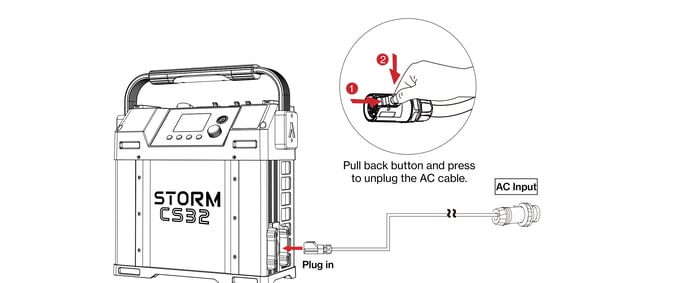
The CS32 supports full-range operation from 100V to 240VAC, with a maximum power consumption of 3200W.
Before use, make sure your power supply can support the CS32's maximum power consumption. If the available power is insufficient or the AC voltage is out of specification, the CS32's power protection circuitry may activate, causing the fixture to shut down or operate abnormally.
Once the fixture is powered on, see Setting Up and Powering to learn about the Power Button, status indicators, and shortcut buttons.