1. Attaching/Detaching the Protection Cover
To detach the cover, rotate the ProLock Handle to the open position and remove it. To reattach the cover, insert it into place and rotate the ProLock Handle clockwise until locked.
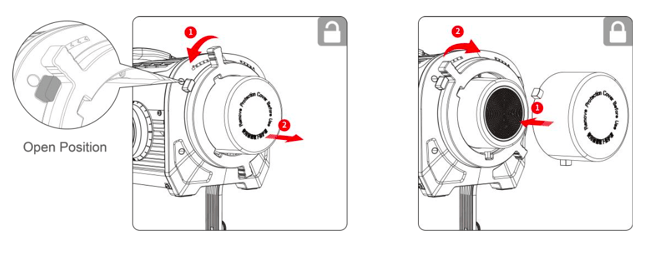
Before use, please make sure to remove the protective cover. During transportation and storage, please attach the protective cover.
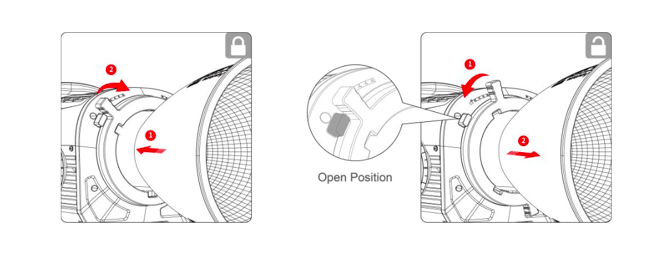
2. Attaching/Detaching the Reflector
To attach the Reflector, insert it into the Bowen Bayonet Mount and rotate the ProLock Handle clockwise until locked. To detach the Reflector, rotate the ProLock Handle to the open position and remove it.
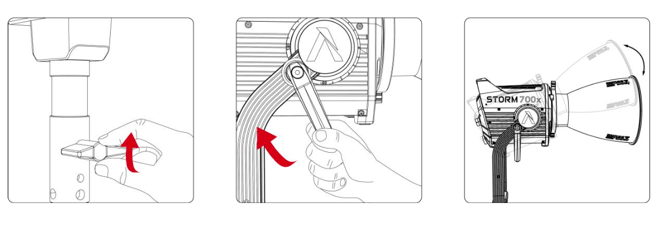
3. Setting Up the Lamp Head
Mount the Lamp Head into a Junior Receiver or onto a Baby Pin stud, and tighten in place. Loosen or tighten the disc brake handle on the yoke to adjust the fixture's angle of tilt.
4. Using the Lightning Clamp
1) Attach the Lightning Clamp onto a light stand.
2) To attach the Control Box, rotate the release lever to unlock the quick-release plate. Then mount the Control Box onto the Lightning Clamp (the release lever will spring back) and check that it is secure.
 3) To remove the Control Box, grasp it firmly, and unlock the quick-release plate by rotating its lever.
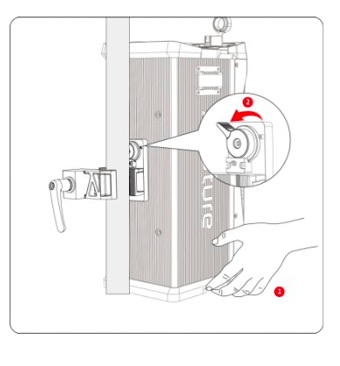
The Lightning Clamp can attach to round or square fittings with a diameter of 2-5cm / 0.79-1.97 in.
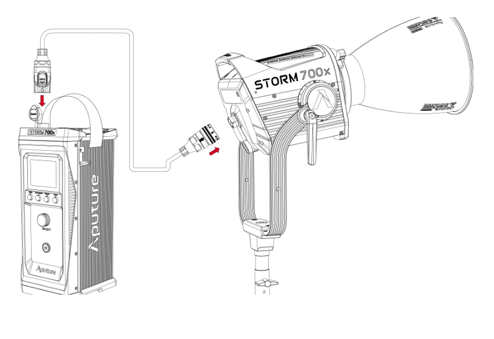
5. Connecting the Lamp Head to the Control Box
Connect the Lamp Head to the Control Box using the 8-pin Weatherproof Head Cable.
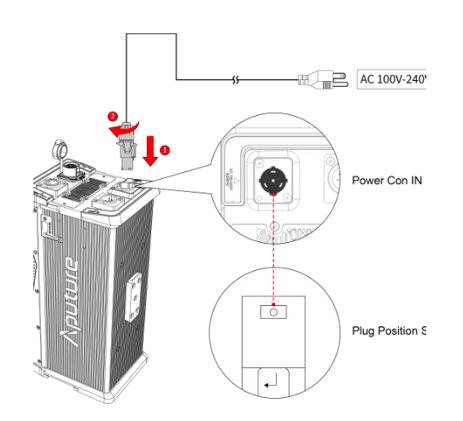
6. Powering Up the Control Box
1) By AC
To disconnect the cable, pull back on the silver release tab on the cable connector, and rotate the connector counter clockwise. Do not pull directly on the cable.