
Pixel Control lets you patch pixelated lighting fixtures and adjust intensity, color temperature, and color per pixel. These tools are designed for pixel-compatible fixtures such as the INFINIBAR, NOVA 9 °, and INFINIMAT, which contain multiple individually controllable sections ("pixels"). Pixel Control gives you the flexibility to create dynamic, detailed lighting looks directly within the app.
Version 2.4.2 rebuilt this workflow with the Pixel Control Suite: gradient fills, press-and-drag multi-select, quick selections, and control over how multiple pixelated fixtures are edited together. See What's New in Version 2.4.2 for the full list.
Quick Start: How to Use Pixel Control
- Patch a fixture with pixel control or create one from scratch
- Tap the Pixel Window button to view and manage your fixture's pixels
- Press, hold, and drag across the pixels to select a range
- Use the quick selections (All, Odd, Even, First Half, Second Half, Invert) to grab a pattern in one tap
- Set a color, or tap Gradient to fill between a first and last color automatically
Once you've set your colors, the slider automatically updates to display a gradient that reflects the selections you've made in the Pixel Window.
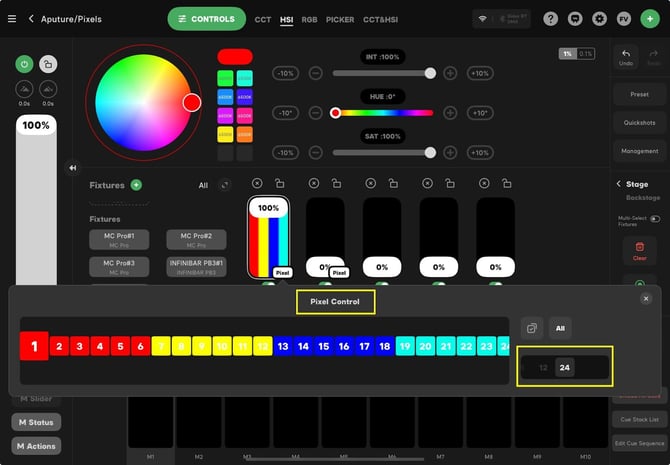
Pixel Window
The Pixel Window provides a visual interface for any fixture patched with multiple controllable pixels.
- View all patched pixels
- Select individual pixels or groups
- Access color and intensity controls per pixel
Select a pixelated fixture, then tap the Pixel Window button in the Parameter Control area. As of 2.4.2 this button is available in Layout View as well as the 3D Visualizer and Fixture View.
View Profile reports the pixel count for any pixelated fixture, and the profile preview (the eye icon) labels each pixel as Pixel 1, Pixel 2, and so on, plus Global.
If you're creating a custom fixture, make sure to define the number of pixels so they appear in the Pixel Window.
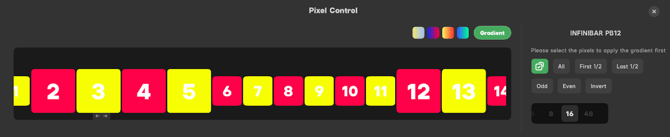
Selecting Pixels
Press, Hold, and Drag
Press and hold any pixel, then drag across the fixture to select a range. Release to keep the selection. This is the fastest way to grab a run of pixels without tapping each one.
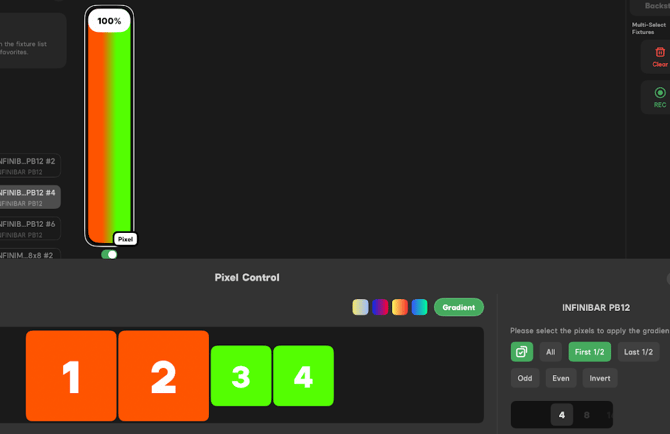
Quick Selections
Above the pixels you will find one-tap selections for common patterns:
- All selects every pixel on the selected fixtures
- Odd and Even select alternating pixels, useful for chases and two-color looks
- First Half and Second Half split the fixture down the middle
- Invert flips the current selection, selecting everything that was not selected
When the Multiselect button is activated, you can pick and choose which individual pixels to adjust.
Quick selections stack with manual editing. Tap Odd, then press and hold to add or remove individual pixels before you set a color.
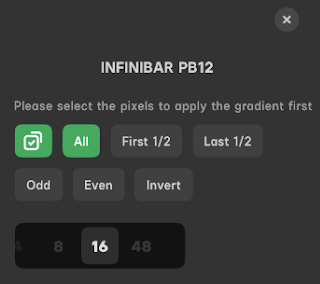
Pixel Grouping
With the Sliding Group Selector, you can divide pixels into temporary groups for faster programming. For example, if you have 24 pixels patched, you can divide them into 4 groups, then adjust each group independently.
- Group 1 = Blue, Group 2 = Teal, etc.
- Each group can be adjusted independently
- Groups can be temporary or reset anytime
Group pixels by location on a tube light to assign separate colors or motion effects.
Gradients
A gradient row sits directly above the pixels in the Pixel Window. To build a gradient:
- Select the run of pixels the gradient should cover
- Tap Gradient
- Set the color of the first pixel
- Set the color of the last pixel
Sidus Link Pro fills every pixel in between automatically. What used to take dozens of individual pixel edits now takes two color picks.
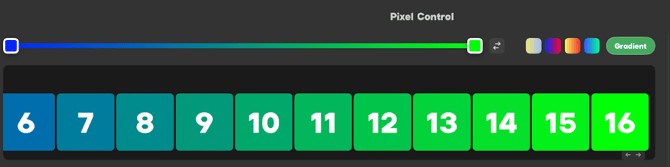
HSIC+ Gradient Control
Gradient endpoints use HSIC+ control rather than HSI or CCT alone. That means a single gradient can run between a CCT value and a hue, for example 3200K to blue, which was not possible in earlier versions.
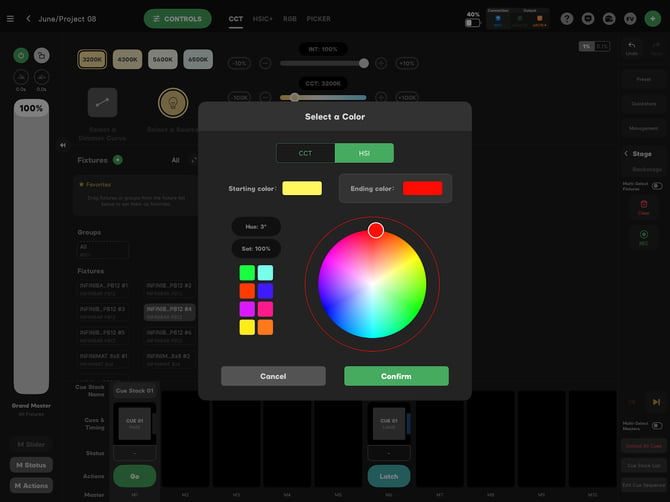
Working with Multiple Pixelated Fixtures
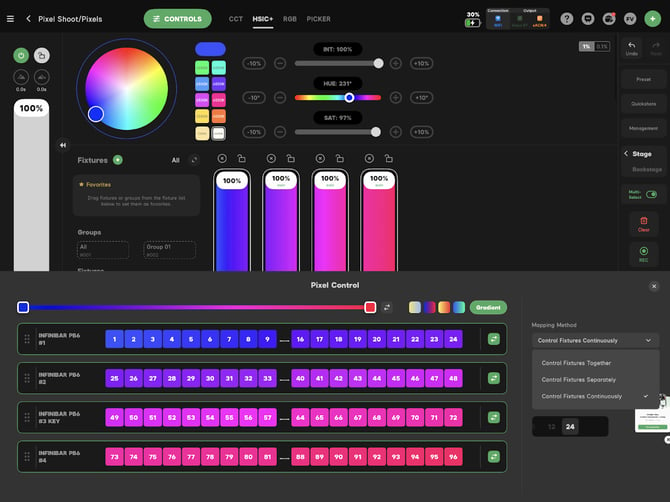
When you select more than one pixelated fixture, a Mapping Method control appears. It decides how a pixel edit is distributed across the selection.
Control Fixtures Together
A pixel position is mirrored across every selected fixture. Select Pixel 7 and adjust it, and Pixel 7 changes on every selected fixture at the same time. Use this when you want identical fixtures to behave identically, for example a row of matched INFINIBARs acting as one.
Control Fixtures Separately
Pixel selections and adjustments apply to each fixture on its own. Even with several fixtures selected, you can choose different pixels on each one without affecting the others. A gradient built in this mode runs across each fixture individually.
Control Fixtures Continuously
The entire selection is treated as one continuous pixel run. Two 48-pixel INFINIBAR PB12s become a single 96-pixel canvas, so one gradient spans both fixtures end to end.
Because a continuous run depends on order and direction, each pixelated fixture gains a pixel order button in this mode. Use it to set where each fixture falls in the run, and which way its pixels count, before applying a gradient.
A fixture hung upside down or flipped end for end will run its pixels in the opposite direction. Set the pixel order before building a gradient across the run, not after.
Custom Pixel Layouts
Not every pixelated fixture is a straight line. Pixel layouts can be defined when you build a DMX profile, so the Pixel Window shows the fixture as the array it actually is.
In Creating Custom DMX Profiles, specify the number of rows and cells for the pixel count you have chosen. Choose 8 pixels and you can lay them out as 2 rows of 4 rather than a single line of 8. An INFINIMAT appears as its proper grid, so selecting the top-left corner in the app selects the top-left panel on set.
Aputure fixtures ship with their layouts already defined. Custom layouts are for profiles you build yourself, including third-party pixelated fixtures.
Finding Profiles Faster
Pixel-heavy rigs mean a lot of profile picking, so the Select a Profile screen and Profile Management both support filtering:
- Tap the star next to any DMX profile to Favorite it
- Show Favorites Only narrows the list to your starred profiles
- Show Patched Lights Only narrows the list to profiles already in use in the show
See How do I patch a DMX-enabled fixture? and Auto-Patching and Auto-Configuration for INFINIBAR for the patching workflow these filters sit inside.